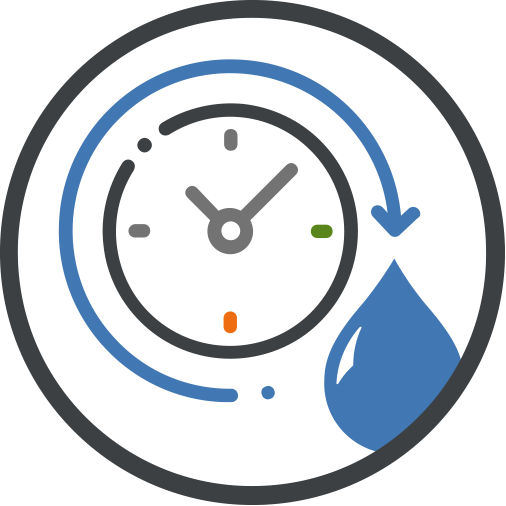
HydroSure Four Outlet Digital Display Garden Watering Timer
48 In Stock
The ultimate time-saving device with 4 independent watering zones. This easy-to-set-up device is ideal for large gardens and plants with different consumption requirements. See Full Description
The ultimate time-saving device with 4 independent watering zones. This easy-to-set-up device is ideal for large gardens and plants with different consumption requirements.
Important Initial Activation Process - Please read the instruction manual before installation
Features 4 separate easily programmable zones. Each outlet is operated by a solenoid valve and works independently of the other allowing you to set four zones to water at different times to maximise water flow from each outlet.
Select the start time of each zone and choose the run time depending on your plant’s consumption requirements.
Plan and program the watering duration from 1 minute to a maximum of up to 3 hours, 59 minutes per cycle.
Customise the watering frequency to start the watering cycle every 8 hours, 12 hours, 24 hours or every 1 to 7 days.
Rain Delay Mode
Save water when it’s raining by manually postponing the watering schedule by 24, 48 or 72 hours.
Activate the Rain Delay by turning the dial to “on” and press and hold the “+” button for 3 seconds. Alter the delay time by switching between the “+” or “-” buttons. Press “ok” to confirm the delay or select “OH” to cancel the delay.
Manual Watering Mode
Manual watering allows you to water without interrupting your pre-set watering schedule. Alternatively, select “off” mode to stop all watering for an extended period. The timer will save all your inputted settings.
Select manual watering mode by turning the dial to the “on” position and holding the “ok” button for 3 seconds. Select the watering zone by pressing the “zone” button to switch between zones.
Set the run time duration using the “+” or “-” buttons. Select “ok” and manual watering will commence immediately.
Each zone must be watered individually and cannot be watered at the same time.
System Maintenance The Timer must be removed from the tap and drained of any sitting water before the first frost. Store over winter indoors in a heated room (such as under the sink) in an upright position.
At the end of each watering season, remove the internal filter and clean under running water ensuring the mesh and rubber seal are intact before replacing it inside the Timer.
The Water Timer is water-resistant, not water-proof. Do not submerge your Timer underwater.
Ensure the Timer is installed vertically to the tap, not horizontally or on an angle. Please Note: The Timer must be installed using the support bracket to protect the Tap from the weight of the Timer.
Battery Installation
Specifications
Inlet: 1” Female thread with removable adaptor to reveal ¾” Female thread
Outlet: ¾” Male thread
Working Water Pressure: 0.5 Bar to 8 Bar
Flow Rate: 22 L/min
Watering Duration: 1 min to 12 hours
Requires 4 x AA batteries (Not included)
Do not use rechargeable batteries
Solenoid valve operated
Irrigation Timer Frequently Asked Questions
How long do the batteries last in an Irrigation Timer?
At the start of every watering season, install brand new good quality batteries and remove the batteries at the end of the watering season whilst the timer is in storage.
Depending on how often and for how long the watering cycles are set, the batteries should last up to 6 months without needing replacement.
You may find that batteries require replacement more often if your timer is set to water twice a day every day as this requires the timer to generate significant amounts more power to operate the internal valves.
Top Tip: Internal mechanisms that start to make a lot of noise indicate the timer requires a new set of batteries.
Are Tap Timers Temperature and Weather Resistant?
• Irrigation timers are water-resistant however, during prolonged forecasted wet weather conditions, disconnect your timer from the tap and irrigation system and bring it indoors. This prevents saturating the internal mechanisms that affect the longevity of your tap timer. Alternatively, a timer installed in a sheltered position or with a DIY protective canopy can be left out during such conditions.
• Bring your timer into a frost/damp-proof shed or garage after the watering season has finished and before the first frost. Your timer features complex internal mechanisms and valves easily damaged by cold weather.
Can the timer be installed horizontally or on its side?
For best results, install your tap timer to the tap in a position where the outlet is facing directly towards the floor. Installing the unit horizontally, on its side or even tipping it upside-down interferes with the direction of water flow and can cause damage to the internal mechanisms.
How do I know if my Irrigation Timer is working?
Most timers arrive complete with a test feature allowing you to check the unit is working. Often this requires you to turn the run time dial to the ‘ON’ position. If you can hear a buzzing noise and the LED light indicator is flashing green, the unit is working correctly.
Top Tip: Before going away on holiday, have your timer fully set up to irrigate your garden for at least a week beforehand. This will allow you to check the system is adequately watering your plants and is switching on at the required times.
How do I attach irrigation pipe or hose pipe to my irrigation timer?
Hosepipe Connection: HydroSure Timers arrive complete with a male outlet tap connector for a simple connection to a Garden Hose using a Hose End Connector. Use any size hose pipe and quick-click connector as the included tap connector is fully compatible.
Irrigation Pipe Connection: Most irrigation systems are built using LDPE Pipe. This is easily connected to HydroSure Tap Timers by replacing the included tap connector with a Barbed or Nut Lock Tap Connector with a ¾” female thread. HydroSure has a range of barbed/nut lock tap connectors to fit multiple pipe sizes - choose an irrigation pipe that best suits your requirements. Top Tip: HydroSure timers are compatible with Irrigation Filters and Pressure Reducers – Further customise your irrigation system by attaching it to the male threaded outlet of your timer.