
How to Build a Water Butt Irrigation System
Irrigation systems alone offer a water-saving alternative to manual watering methods using up to 90% less water when switching. Irrigation systems deliver water directly to the plant's roots slowly and with supreme accuracy for maximum soil absorption. An irrigation system fed directly from a water butt or rain barrel offers these water-saving benefits and more. For an environmentally conscious way to water your garden, a water butt irrigation system recycles nutrient-rich rainwater allowing your plants to thrive.
Connecting Irrigation Pipe and Garden Hose to a Water Butt
Hose Pipe to Water Butt Installation
The outlet connection from a water butt tap is usually barbed and compatible with a 13mm Soaker Hose, Drip Line and LDPE. For a secure connection, push the pipe onto the barb and use a Ratchet Clamp to hold it in position. The tap can then be switched on/off manually depending on when you would like to run your irrigation system.
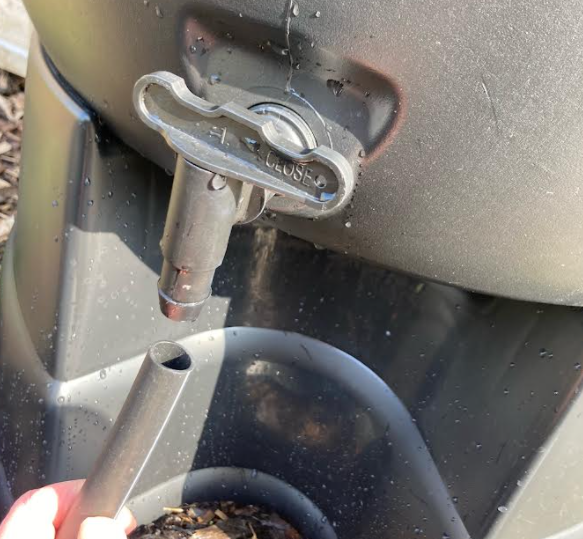
For a secure connection, push the pipe onto the barb and use a Ratchet Clamp to hold it in position. The tap can then be switched on/off manually depending on when you would like to run your irrigation system.
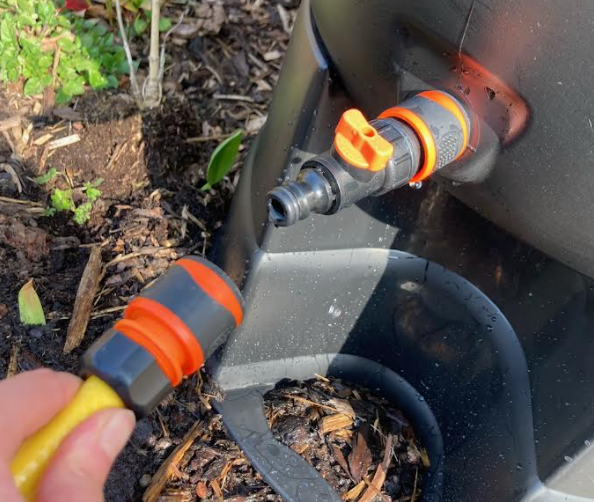
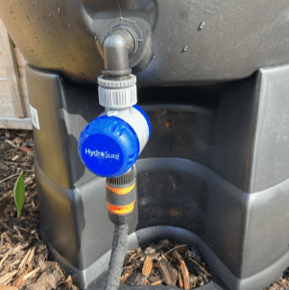
For hosepipe to water butt installations, use an Accessory Connector threaded into the 3/4” female thread on the water butt and connect a Hose End Connector with Control Valve to the male outlet of the accessory connector.
Alternatively, use a Male Threaded Mini Valve Connector alongside a ¾” Tap Connector. The hosepipe is then connected onto the male outlet of the control valve using a Hose End Connector.
Using a Tap Timer with a Water Butt
The HydroSure Dual Outlet Timer and HydroSure Single Outlet Timer function at low pressures making them fully functional with the pressure generated from a water butt. Please Note: The water level must remain at half to full capacity to generate enough water head weight before the internal mechanisms will open and switch your system on.
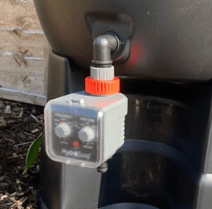
To connect a Timer or LDPE Pipe to a Water Butt, replace the tap with a 3/4" Male Nut Lock Elbow threaded into the female connection on the water butt. Remove the nut and tapper to reveal another male thread. The 90-degree angle of the nut lock elbow creates the ideal positioning for threading on a Water Timer that acts as a valve/tap to switch the water flow to your system on/off. Top Tip: Installing a water timer vertically protects the internal mechanisms ensuring optimal functioning.
HydroSure Timers have a removable quick click tap connector that can be replaced with a 4mm or 13/14mm Barbed Tap Connector for easy installation with Micro Pipe, 4mm Drip Line, 13/14mm LDPE or 14mm Drip Line.
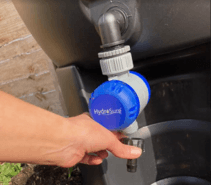
Connecting LDPE Pipe and Drip Line to a Water Butt
When substituting the water butt tap with any male thread for installation into the sidewall of a water butt, remove the rubber sealing ring from the tap and place this onto the male thread of the substitution component. This ensures a watertight seal between the outlet of the water butt and any connectors used. Establish this connection before the water butt is filled and use a Control Valve or Timer to plug the water butt until it is ready to use. Top Tip: The Control Valve reveals a 3/4" female thread when the hose end is removed that is compatible with a 3/4" Nut Lock Connector with a male thread.

What areas of the garden can be irrigated using a Water Butt?
Use a water butt irrigation system to water almost anywhere in the garden. The ability to connect multiple types of irrigation pipe means a water butt system can be used to irrigate flower beds, vegetable plots, raised planters, pots and plants in a greenhouse.
Designing a Water Butt Irrigation System
When designing a water butt system, the water level at the lowest point of the water butt must be situated higher than the highest emitter. This is because systems fed directly from a water butt rely completely on the pressure generated from gravity.
To increase the pressure, raise the height of your water butt by installing it on a Water Butt Stand. Optimal performance will also depend on the water head weight. As the water level in your water butt decreases, so does the water pressure causing a reduction in emitter performance. To ensure your irrigation system always has enough available water, double up on rainwater collection by connecting multiple water butts together.
Watering Hanging Baskets Using a Water Butt Irrigation System
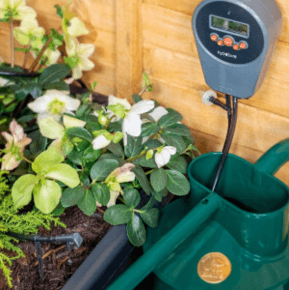
Hanging baskets are often situated above head height making it almost impossible to raise the height of the water butt above the hanging basket. HydroSure Indoor Watering Kits feature a water timer complete with a pump that draws the water from the water butt to the drippers.
Place the dropper into the top of the water butt and install the controller to a wall or fence using the included bracket. The timer can be installed up to two metres from ground level and the drippers, up to 5 metres away from the pump either lower or at a maximum of 1 metre above pump height. This solution offers flexible watering to overhead baskets from a rainwater tank.
Water Butt Irrigation Systems
As with any irrigation system, a water butt fed system should have an End Cap installed at an open end of the pipe to maintain pressure within the system so emitters can function optimally. To produce accurate wetting patterns, secure your irrigation pipe using Pipe Stakes along every metre length. It is also recommended to use a Ratchet Clamp at every barbed connection point to produce a watertight connection helping to further minimise water wastage.
Soaker Hose Water Butt System
Install a Soaker Hose directly to the barbed outlet of the water butt tap or alongside a Water Timer using a Hose End Connector attached to the soaker hose to connect it to the timer outlet.
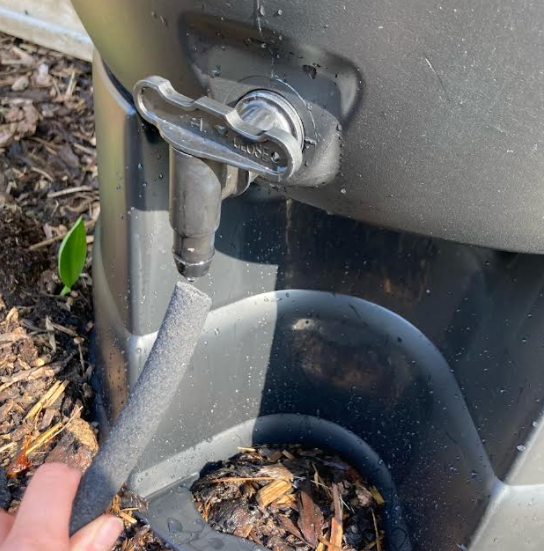
Install a Soaker Hose directly to the barbed outlet of the water butt tap or alongside a water timer using a HydroSure Water Butt Connector PipeHose end Connector attached to the soaker hose to connect it to the timer outlet.
When designing a soaker hose irrigation system fed directly from a water butt, bear in mind the flow rate generated from the water butt is enough to supply a soaker hose up to 13mm in diameter and in lengths up to 15 metres. To calculate how often and for how long a Soaker Hose system can run from a water butt, use the below information as a guide.
If a soaker hose emits 2-4 Litres per hour per metre along a length of 15 metres, it will emit up to 60 Litres per hour. If a watering cycle is 20 minutes long, each cycle will use around 60 Litres of water. For optimal emitter performance, ensure the water butt remains at half to full capacity to generate enough water head weight for each cycle.
For a ready to use solution, why not try the HydroSure Essential 15m Soaker Hose Irrigation Kit?
Drip Line Water Butt System
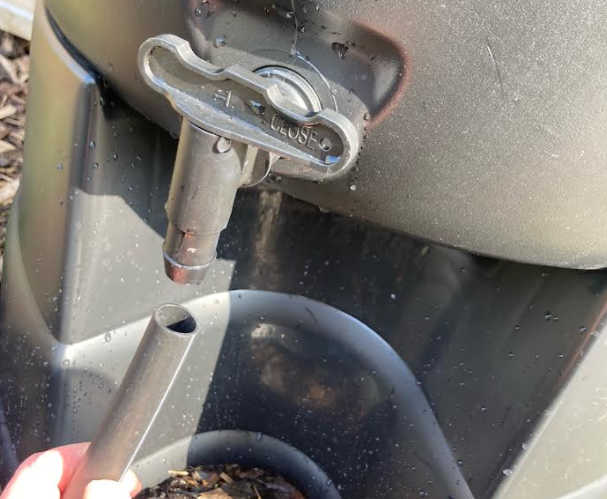
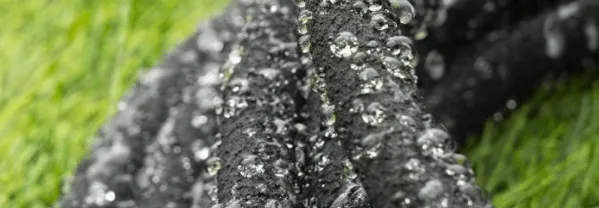
Connect 14mm Drip Line to the barbed outlet of a water butt tap or attach 4mm or 14mm Drip Line by using your water butt alongside a Water Timer. Simply switch the quick click tap connector supplied with your water timer for a Barbed Tap Connector with the correct sized outlet for your pipe size.
Connect 14mm Drip Line to the barbed outlet of a water butt tap or attach 4mm or 14mm Drip Line by using your water butt alongside a Water Timer. Simply switch the quick click tap connector supplied with your water timer for a Barbed Tap Connector with the correct sized outlet for your pipe size.

When designing a drip line irrigation system fed directly from a water butt, bear in mind the flow rate generated from the water butt is enough to supply drip line with diameters up to 14mm and in lengths up to 15 metres. It is recommended to use Non-Pressure Compensated Drip Line as this is capable of operating at low pressures generated from a water butt. To calculate how often and for how long a drip line system can run from a water butt, use the below calculation as a guide.
If a length of drip line emits up to 2 litres per hour from each emitter and there are three drippers situated per metre, a length of drip line will emit 6 litres per hour per metre. Along a 15 metre length, the drip line will emit 90-Litres per hour. For optimal emitter performance, ensure the water butt remains at half to full capacity to generate enough water head weight for each cycle.
For a ready to use kit the HydroSure Micro 15m Drip Line Irrigation Kit is an ideal solution. Please note: The pressure reducer included with this kit is not required for water butt systems.
Water Butt Irrigation Systems
Micro Drip Water Butt System
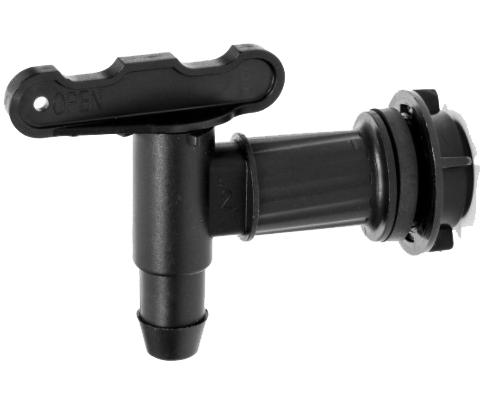
To install a micro drip irrigation system to a water butt, connect a length of LDPE Pipe to the barbed outlet of a water butt tap or attach 4mm Micro Pipe or 13mm LDPE by using your water butt alongside a Water Timer. Simply switch the quick click tap connector supplied with your water timer for a Barbed Tap Connector with the correct sized outlet for your pipe size.
To promote maximum water flow, we recommend using 14mm LDPE or Micro Pipe in short lengths up to 15 metres. Use Non-Pressure Compensated Drippers either directly installed into the wall of 13mm pipe or branch off the LDPE pipe using 14mm to 4mm Reducing Tees to connect with Micro Pipe. Alternatively, use micro pipe as the main lateral pipe and branch off emitters using 4mm Cross Connectors and Tees.
A water butt system can produce a flow rate to power up to 20 to 25 drippers that emit around 6 litres per hour. Using this many drippers in a system will use around 120 - 150 litres of water per hour. If a watering cycle is 20 minutes long, each cycle will use around 50 Litres of water. For optimal emitter performance, ensure the water butt remains at half to full capacity to generate enough water head weight for each cycle.
For a ready-made solution, the HydroSure Value 20 Pot Drip Irrigation System is compatible with water butts. Please note: The pressure reducer included with this kit is not required for water butt systems.

Water Butt Installation Tips
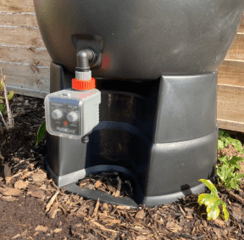
Before the water butt begins to fill with water, place it on a water butt stand. The curved edge should be positioned facing outwards allowing a bucket, water timer or connection outlet to be easily installed.
Installing a Water Butt from a Downpipe
The connection between a downpipe and water butt is usually quite straight forward and most water butts arrive complete with fitting instructions.
1. Install your water butt by fixing it to your downpipe. The diverter should be connected to your water butt via an indentation that can be cut out of the sidewall of the butt using a drill.
2. Measure the distance from the downpipe to the hole you are about to create to ensure your flexible pipe will fit. Most water butt connectors arrive complete with nuts and washers for simple connection to your water butt via the inlet hole located at the top of the water butt near the lid.
Top Tip: A water butt becomes very heavy when full, before allowing the water butt to fill with rainwater, install any outlet connectors and place it on a water butt stand.
Joining Multiple Water Butts
A number of water butts can be joined together to harvest more rainwater to supply your irrigation system and create a more reliable irrigation system without the need to always keep an eye on the water level. The kit works by filling the first water butt until it is filled, rainwater will travel along the length of flexible pipe back into the next reservoir.


