

How Compression Fittings Work
Compression fittings are designed to join underground supply/irrigation pipe including HDPE and MDPE pipe. They are robust enough to withstand the high pressures of an underground irrigation system, such as a pop-up sprinkler system.
We offer all the connectors you need in various different sizes and threads to allow you to build an underground irrigation system tailored to your layout.
This Guide Contains:
What to Look For in a Compression Fitting
Key Features of a Compression Fitting
How to Install and Remove a Compression Fitting
What to Look For in a Compression Fitting

Working Pressure
Working pressure refers to the maximum level of force created within a pipe or fitting before the structure begins to weaken and the fitting may begin to leak. Our Hydrosure Anti-Leak Compression fittings designed for irrigation systems can withstand pressures up to 10 Bar and our Hydrosure WRAS approved fittings can withstand pressures up to 16 bar.
Top tip: Make sure you only run pressure through your system that matches the bar pressure of your lowest component.

Durability
The compression-fitting Body and Nut are made from tough and durable Polypropylene Copolymers. The internal ‘O’ Ring is made from split-resistant materials to protect against disintegration and ensure a water-tight seal remains over time. HydroSure Compression Fittings are designed to be frost-proof and withstand freezing temperatures. The fittings are tested to be highly impact-resistant to ensure an underground system lasts a long time.
Please note: Compression fittings are not intended for hot water usage.
Compatibility
We stock a range of compression fittings in 20mm, 25mm, and 32mm diameters including, Joiners, Elbows and Tees designed to join lengths of HDPE and MDPE pipe. Also in the range are Threaded Adaptors allowing you to add Solenoid Valves to your system or use Threaded Tees and Threaded Elbows to connect Pop-up Sprinklers to your pipe work.
We also stock a range of other connectors, such as Stop Taps, End Caps, and many more to help you build a system fully customised to your garden layout.

WRAS Approved
WRAS-approved fittings must be used in potable/drinking water systems. Fittings that meet WRAS Approval are constructed from materials that do not leach any dangerous chemicals into the water supply nor do they harbour any bacterial growths. WRAS-approved fittings need to meet standards and undergo rigorous testing to comply with British regulations and Scottish Bylaws.
Key Features of a Compression Fitting
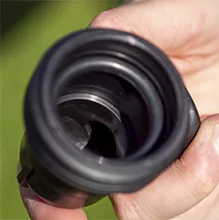
Main Body: The body of a compression fitting is manufactured to have a smooth internal wall to minimise friction loss as water travels around your irrigation system. Reducing friction loss is important to maintain enough water pressure to allow other components in your system, such as Pop-up Sprinklers to maintain adequate pressure to work effectively.
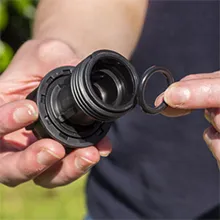
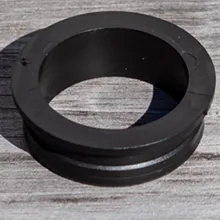
Grip/Clinching Ring: Another essential component of the compression fitting. It has small teeth like grips that lock into the pipe wall to ensure a strong connection and ensures the pipe does not pop out of the fitting.
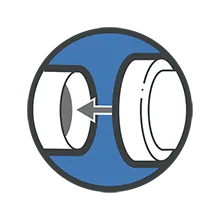
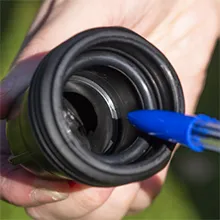
‘O’ Ring: An essential feature for ensuring a water tight seal. When water is fed through the pipe, the water pushes against the ‘O’ ring stopping any water leaking out of the fitting even at high pressures.
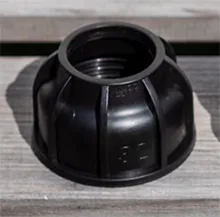
Nut: When tightened, the Nut plays the role of contracting the Grip/Clinching Ring around the pipe pushing the teeth like grips into the pipe, and holding it in place. To ensure an even more secure connection, use a ‘C’ Spanner or Pipe Wench to tighten the nut.
Thrust Ring: A component that is inserted into the main body of the fitting designed to ensure the ‘O’ ring remains in place. As the Nut is tightened, the Clinching Ring pushes the Thrust Ring against the ‘O’ ring. This enhances the force of the ‘O’ ring around the pipe maintaining a water tight seal.

PTFE Tape is a sealing tape that should be used on all threaded connections in your system to help create a water tight seal.
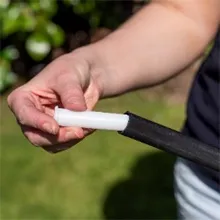
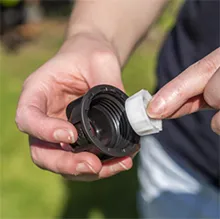
Using a pipe liner provides reinforcement by strengthening the pipe and preventing it from buckling. Without it, the structure of the pipe can become compromised and disrupt the flow of water. Before attaching the pipe to the compression fitting, you will need to push the correct diameter pipe Liner/Insert into your pipe.
Please Note: Pipe Liners must be used for WRAS approved/potable water systems.
How to Install and Remove a Compression Fitting
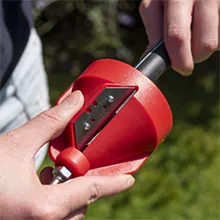
1. To ensure a clean edge, prepare the pipe using Pipe Cutters and cut the pipe to the required length. To avoid compromising the water tight seal and damage to the 'O' ring, use a Pipe Chamfering Tool to blunt the edge of the pipe. Avoid letting any fragments from the pipe remain in the system as this can cause blockages in valves or sprinkler heads.
Warning: Both items have a sharp edge, so take care when using.

2. Insert the Nut followed by the Grip/Clinching Ring tapered edge first onto the pipe so that the widest part on both faces the main body of the fitting. Make sure the ‘O’ Ring is securely in place inside the pipe fitting and is free from any twisting.
3. Use a silicon-based lubricant both on the edge of the pipe and inside the fitting to make it easier to push the pipe into the main body of the fitting. Insert the pipe by twisting and pushing. Ensure you push the pipe firstly past the ‘O’ Ring and secondly towards the Pipe Stop inside the fitting.
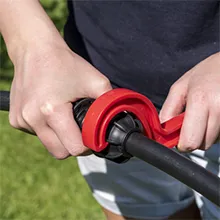
4. Slide the Grip/Clinching ring up to the edge of the fitting body. Then, do the same with the Nut Ring but instead, threading it onto the compression fitting body by hand first then use a Compression Fitting Wrench to ensure a water tight seal and avoid leaving marks on the Nut Ring, creating a more secure connection.
Installation Top Tip
The easiest way to tell when you have hit the pipe stop is to prepare the pipe beforehand by holding the pipe next to an assembled compression fitting in line with the Pipe Stop on the main body. Place a mark on the pipe where it will exit the fitting if it were successfully installed. This mark will be where you need to push the pipe up.
How to Reuse a Compression Fitting
Compression fittings can be removed from the pipe and reused. There is no need to saw the pipe off like with most fittings. Instead, all you need to do is unscrew the Nut (you may need to use a Compression Fitting Wrench if the Nut has been tightened). The Grip/Clinching Ring can be easily prised open and put back into the fitting. The pipe can then be removed from the body of the fitting.
If you wish to re-insert the pipe, just make sure the ‘O’ Ring is still in the correct position and free from twists.
Installing a Compression Fitting Underground
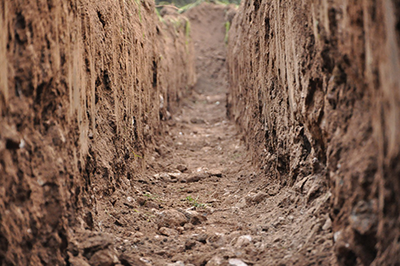
Digging a Trench for an Irrigation System
1. Begin by drawing a diagram of your garden and mapping out where you want to set out your system.
2. When choosing where to install your pipe and fittings, try to avoid patios, decking or other features in the garden as these will prove difficult for installation or if leaks occur in the pipework later on.
Top Tip: As MDPE and HDPE pipe tends not to be flexible, you must set out your pipework in straight lines and use tees and elbows to take the pipe around corners or change direction.
3. Use the diagram of your garden layout to mark out where your compression fittings and pipes will be laid. A good way to do this is by using a pipe stake in the ground to indicate a compression fitting and use string or chalk for pipe work.
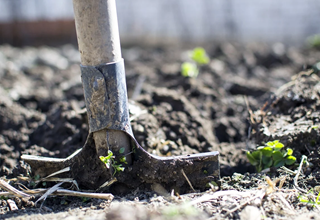
4. Use a spade to dig a trench at least 12 inches/1 foot deep to ensure your system is protected from direct sunlight and frost.
Top Tip: Use a Garden Bag to place excess soil from the channel to protect the rest of your lawn.

4. Use a spade to dig a trench at least 12 inches/1 foot deep to ensure your system is protected from direct sunlight and frost.
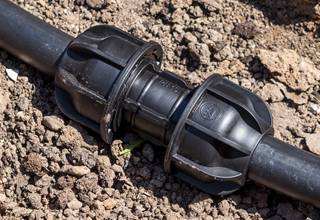
Repairing a Leak Using a Compression Coupling
Occasionally, an underground pipe can degrade or become damaged. This can cause a leak in your irrigation system. It is important to fix any leaks to maintain an efficiently working system and to prevent water wastage.

Locate a leak in a system by checking for wet spots or water pooling. This indicates where the pipe may have split or a fitting may have come loose. Another indication of a leak is hearing water leaking even when the system is turned off.
Look out for any zones in your system with low pressure or where the sprinklers are not working at their peak. If you are using a controller or timer with multiple outlets, you can turn on/off zones to help you determine where the leak is. Once you have located the leak, dig out a trench deep and long enough on either side of the pipe.
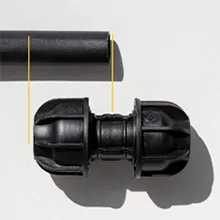
Use Pipe Cutters to cut away the damaged area of the pipe trying to save as much pipe as possible. Next, attach a Compression Coupling/Joiner to bridge the gap between the two pipes to mend the leak and create a watertight connection.
Top Tip: Test the system first to ensure the problem has resolved before you fill in the soil back over the joint.
Compression Fittings - Features we Love
Attaching a Pop-Up Sprinkler to a Compression Fitting
Use a Female Outlet Threaded Tee to attach your pop-up sprinkler. Begin by attaching your MDPE or HDPE pipe to the horizontal outlets to provide a water source for the sprinkler. Then use a Male Threaded Swing Joint with the same thread size as the female outlet of your compression tee and attach it to the compression fitting.
Your sprinkler can be threaded onto the top of the swing pipe/swing joint. Be sure to check the thread size of your swing pipe matches that of your compression fitting and sprinkler. Alternatively, use a threaded tee and attach your sprinkler directly to the threaded outlet.
Top Tip: Use PTFE tape around the thread of the swing pipe/joint for a better seal between the threads.

Mechanical Compression Stop Tap
A Stop Tap, also known as a Stopcock, is a WRAS approved in-line fitting allowing you to stop the water flow through HDPE and MDPE pipe.
The product is designed to withstand working pressures of up to 16 bar and features internal valves allowing you to regulate the flow of water. Before installing the fitting, insert pipe liners both ends of the pipe.

Speedy Assembly: A Quick Way to Insert a Compression Fitting Into a Pipe
Compression fittings can be installed quickly and easily without having to take the fitting apart. You can use the part/fast assembly method to attach your pipe to the compression fitting.

